Thursday 20 June 2013

Finished Projects


Left: Projects brought into class for display with pull board. Right: a close up of finished pieces.


A close-up of the failed piece. The copper is made with 7 petal and single knots out of 20 gauge wire. The brass is made with 3 petals and single knots as well but out of 24 gauge wire.


Left: A finished 24 gauge silver plated copper and brass piece next to a finished 18 gauge aluminum piece. Right: A 24 gauge silver plated copped and brass with seven petals and double knots.


A piece with two wires used simultaneously; 28 gauge copper and some kind of 28 gauge silver-looking metal alloy with 5 petals and single knots.


Left: The same piece as above. Right: The pull board, pliers, and the end of a petal after removal.


From left to right: A 5 petal single knotted piece, a 5 petal double knotted piece, and 3 petal double knotted piece. All of these had been done in 24 gauge brass wire and pulled through different sized holes in the pull board. The middle piece is the tightest and most dense.


Photos and Captions by Maia

Process Photos with Captions


An example chain by Katie Gibson with the tail attached and the pull board underneath. 


Left: 26 gauge coated copper. Right: 26 gauge silver plated copper. Both by Katie Gibson. 


Left: Closeup of above silver plated chain. 
Right: 26 gauge uncoated copper, modern beaded bracelet by Katie Gibson.


The "petal" or starting base of the chain.


Left: From card to dowel.  Right: The petal, for relative size.


Left: Example started by Katie Gibson. Right: The first knot.


Progress on a 24 gauge chain with a silver plated copper and brass, base made from 26 gauge copper.


Dylyn working on an 18 gauge aluminum chain.


Katie showing N'Donna how to start a chain.


Progress on the 24 gauge silver plated copper and brass chain with a 26 gauge copper base.


Left to right in order: Dylyn, Maia, and N'Donna's progress with 18 gauge aluminum, 24 gauge silver plated copper/brass, and 24 gauge brass.


Left: A finished example by Katie Gibson. Right: Finished piece next to started chain on dowel.


Left: 18 gauge aluminum wire off the dowel. Right: The first pull through the board.


Pulling Dylyn's 18 gauge aluminum wire being pulled through the board


Left: N'Donna's 24 gauge brass being pulled through the board. Right: Maia's finished 24 gauge silver plated copper and brass with a larger gauge fastening fashioned by Katie.


Left: The starting point of a trichinopoly chain with the tail from the first knot visible under the weaving. Left: Progress after one length of 24 gauge brass wire.


The weaving process on a "double" in which one knots above the previous two knots instead of the first knot directly above it.


Left: The end of a 24 gauge brass piece with the tail visible. Right: The knots on a finished 24 gauge brass five petal, "double" knotted  trichinopoly chain.


Left: The tails from wire add-ons visible in the dowel under the weaving. Right: a "double" five petaled(R) and "single"3 petaled(R) pieced both in 24 gauge brass with the knot difference apparent. 


Photos by Maia
Captions by Dylyn and Maia


Tuesday 18 June 2013

Final Research Questions

1). Does dowel size make a difference when working with trichinopoly?
2.) What type of wire was easiest to work with and what was the most difficult?
3.) Did the number of petals make a difference when working with trichinopoly?
4.) Did both gauge and the material make a difference in working on trichinopoly? Did one alter the process and final product more than the other?


- Maia but came up with by the group

Friday 14 June 2013

Post-Project Completion - Trichinopoly

Let me start this post off by saying that I wish I could provide more photos of my project.  I believe Maia will be posting a blog shortly with all the completed pieces, and I only have one photo showing a "work in progress".  But I did want to briefly discuss my feelings about this now that the presentation part of the assignment has been completed, especially now that we are transitioning to the research report portion.

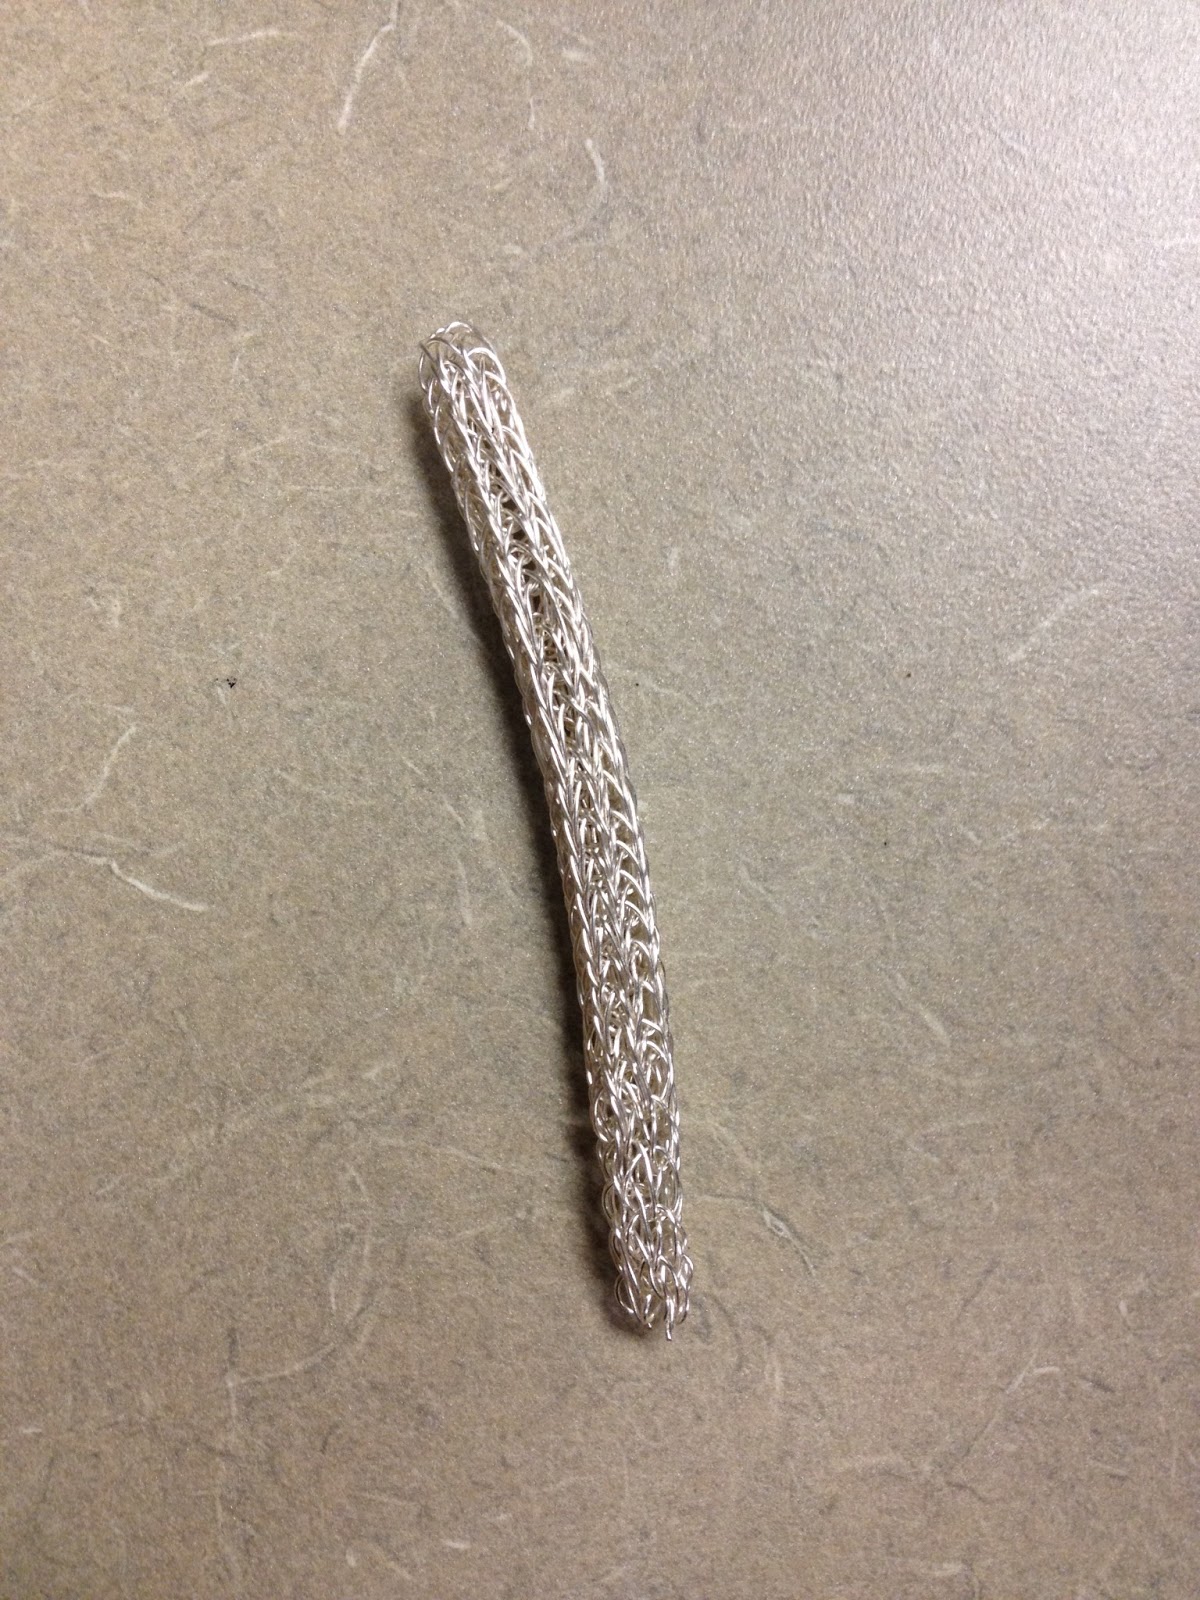
A double strand of copper and silver-plated brass, single knit, in progress
First off, trichinopoly is much easier than it sounds or looks.  Dylyn's mother showed us how to do it in an afternoon, and the process was quite easy.  While I'm not crafty enough to give proper directions, I will do my best to explain the process.

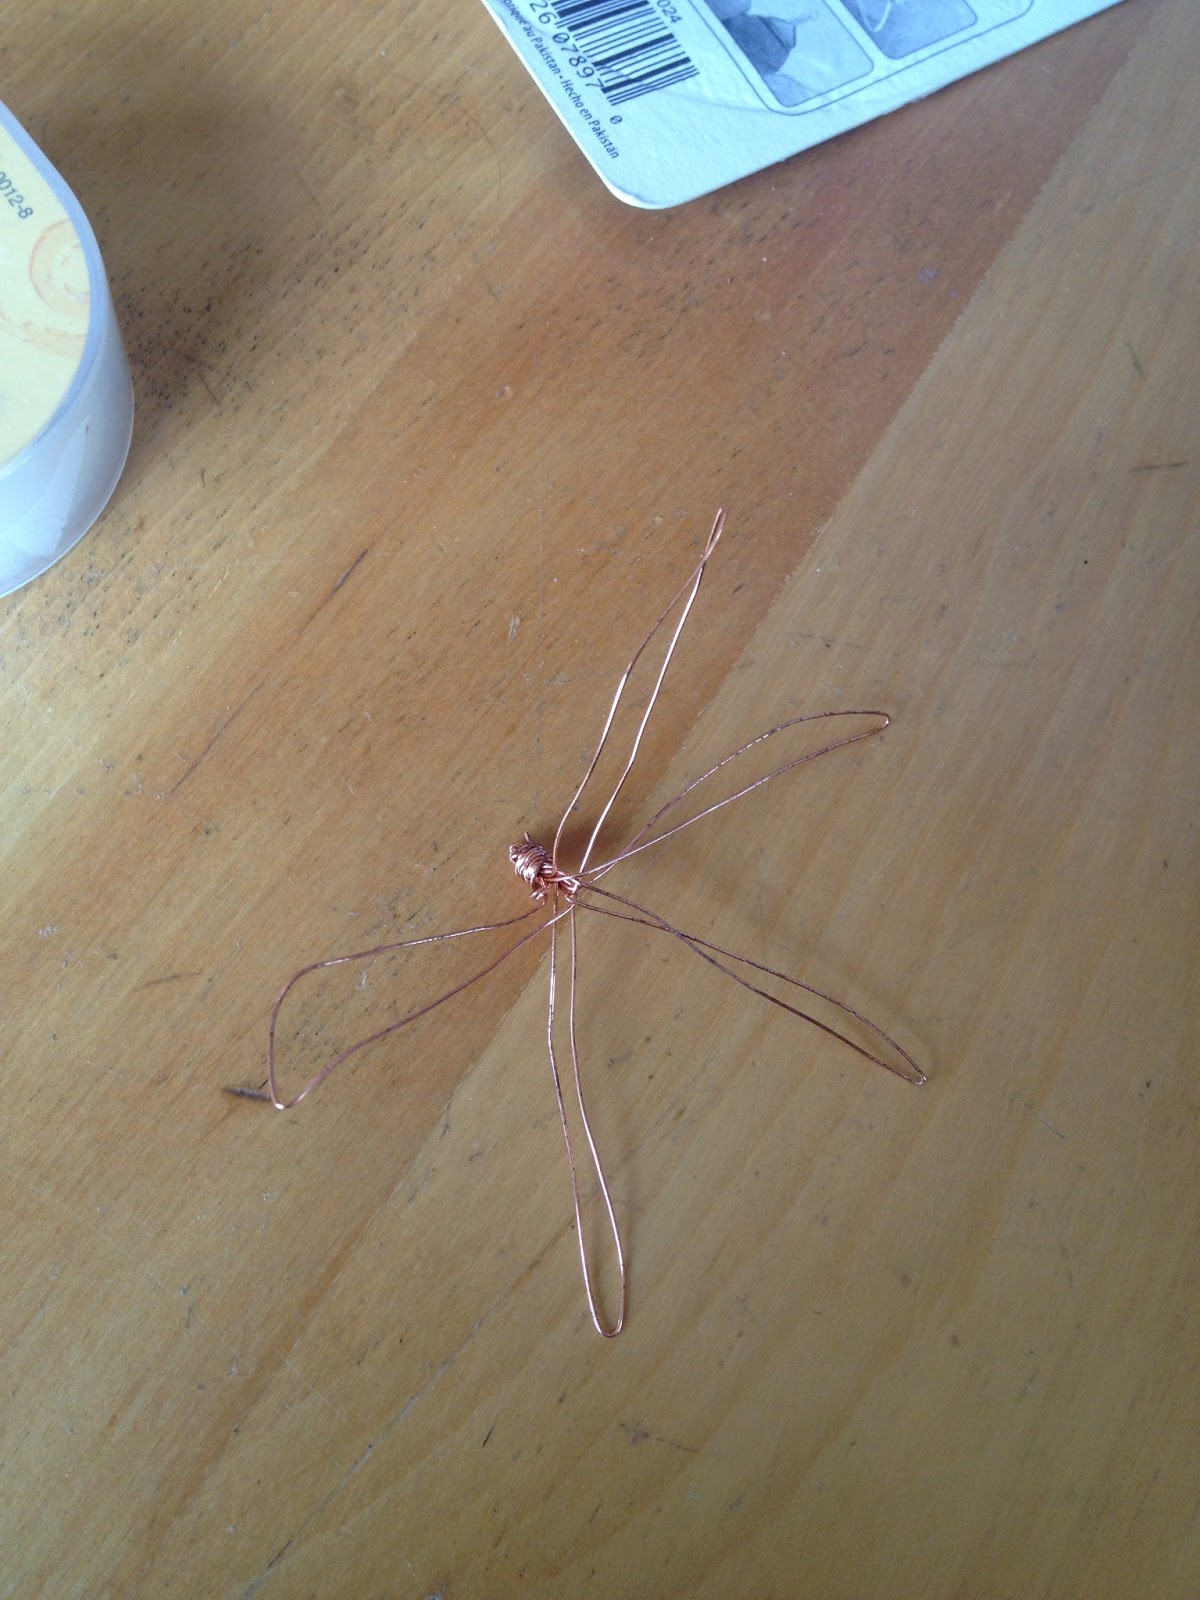
  1. We took a small amount of wire and wrapped it around a ruler a set amount of times (for this one, it was five, but Maia made one with three petals, and Dylyn may have made one with seven).
  2. Removing the ruler, we shaped the wire into petals (I had five).  The petals were then folded down onto the 1/2-inch wooden dowel and kept in place with scotch tape.
  3. I drew two-to-three arm length pieces of wire from the spool (for my first piece, I used two, but for this one, I used three).
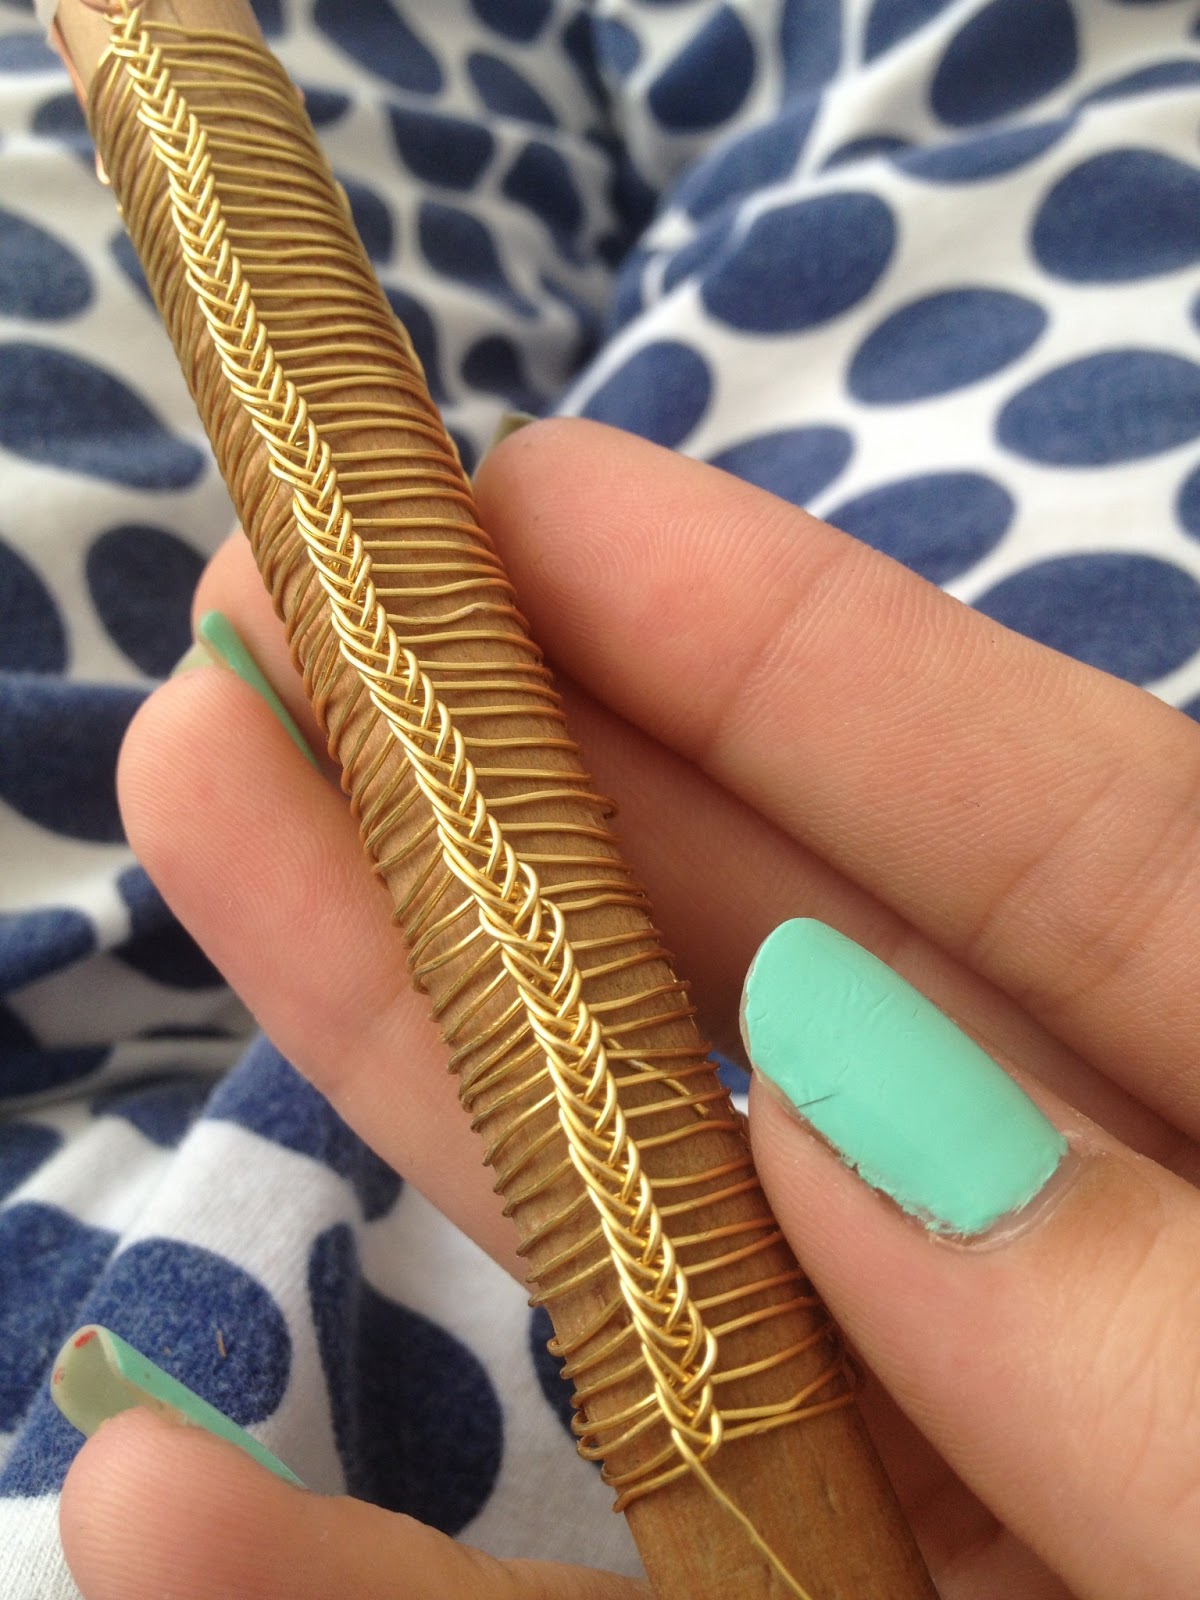
  4. Now this is where my memory gets hazy.  For the first row, you take wire behind the petal, drawing it all the way through until the very end, leaving a small tail.  
  5. Then, you pull the wire to the left and then to the right, so it makes a small loop, or a "knot".  You repeat this with all other petals to make the first row.
  6. Now, from the second row onward, you guide the wire behind the knot you've made, continuing to make new "knots".  For knitting fans, it's kind of like a "purl" stitch, since you are going behind the knot.
  7. Continue on until the piece is the desired length, "knitting" new pieces of wire along the way.
  8. The piece is then removed from the dowel.  Using a pull board, the chain is pulled through each hole twice, and the holes decrease in size.  As the chain is pulled through, it gets smaller and tighter until it reaches it's desired size.
I'm pretty sure my explaining lacks a few steps, which I will redress in the report.  With the guidance of Dylyn's mother, I finished my first piece in a little over an hour, and finished the second in an afternoon.  The first material I used appeared to be size 24 brass, and it was an easy material to use.  It was easy to knit with and there were no wire breaks.  I also had no problem using the 28 copper and silver (or steel)-plated wire used to make the second piece.  Because the 28 was the thinnest, it required more wire to get to my desired length.  But once pulled through the pull board, it resembled the pieces we've seen in our literature, which leads me to at least speculate that thin wire was probably the most preferred wire of that time period.

I really enjoyed learning how to do Trichinopoly, and I'm considering making more chains for a few pendants I have lying around my house.  However, as we sat around, making pieces, I couldn't help but wonder if Trichinopoly pieces were solely done by artisans.  Sadly, I have no evidence to back it up, but I wonder if this was a two part process.  There were those who pulled/created (men?)  the wire, and those who took that wire to create the chain (women).  I could see a group of women sitting around, creating this pieces while socializing with others.  From the websites I've read (again, there is no corroboration from peer-reviewed journals), Trichinopoly chains were used not only as jewelry pieces but also as trim for clothing.  In this vein, it could have easily been done by normal people when making their clothes they wear, especially special outfits.  But again, that just comes from my understandings and experiences in crafting, and I understand that things could have been different at that time.  I will more than likely have to see about finding any other kind of literature that can help to sharpen the picture.

-N. Russell

Saturday 8 June 2013

Group Shopping Trip - Supplies


On Monday June 3rd, my group and I went shopping for supplies at Michaels craft store. We ended up purchasing a few items to supplement the things that Dylyn's mom already had from doing trichinopoly before. She is the one actually teaching us the process for making trichinopoly chains which she had learnt through crafting groups of various sorts. Dylyn's mom owned 20, 26, and 28 gauge wire which we assumed was probably a silverish mental alloy of some kind or copper. We purchased: 20 gauge copper wire, 18 gauge aluminum wire which is rather large for trichinopoly, 24 gauge brass plated wire, and 24 gauge german style silver plated brass and copper wire. Sadly, none of the wire packaging had labels concerning the metal content of the wires so some guessing and online searching took place. Going larger than 18 gauge may be difficult since the next common size up from 18 is a 16 gauge wire which is rather thick and difficult to work with. For reference... nostril piercing jewelry is made out of 18 gauge material which is usually bendable and jewelry used in an eyebrow is typically 16 gauge and quite solid. We also bought different sizes of dowels: 5/16", 1/2", and 7/16" to test diameter differences if the other materials allow for it. By that I mean providing the paddle which the dowels are pulled through to tighten the chain will fit the dowels. We have not yet seen the equipment involved in person.

All of us are rather excited to start the process Saturday morning now that we have all these new materials. Our research questions will probably need some reformulation after this purchase because of realizing what is available to us. I will be posting more photos of the process this weekend.


 - Maia